

How To Draw An Animation By Rotoscoping A Video
How To Draw An Animation By Rotoscoping A Video
Rotoscoping is a technique of drawing over the frames of a video to create a realistic animation. It's a keen fashion to create a professional-looking animation without having to organically draw each individual frame—and you can practise it using Adobe After Effects.
Yous might believe that animators ever draw their characters from scratch, but many first off past tracing a video reference frame-by-frame. Rotoscoping is fourth dimension-consuming, but it doesn't crave whatever drawing ability and often leads to a polished-looking final product. Yous can use this tutorial with any video you have on-manus. I used an iPhone video of my friend dancing, but you lot can search for something specific on the internet and utilize that too. (And, fun fact: Since we will exist drawing over the video, at that place are no copyright issues with using someone else's footage for this projection! Just be sure to hide the actual video in stride six.)
- Bring your video into Afterwards Effects and choose a pocket-size portion to animate.
To begin, drag your reference footage into Adobe After Effects. Create a composition from the video layer. Beware—rotoscoping is a tedious process. Animative i second of motility might take yous as long every bit 30 minutes, and then don't select a long clip unless you have plenty of time on your hands.
- Double-click the brush tool (
 ) on the video to create a paint layer.
In one case this is created, y'all can select your paintbrush as well.
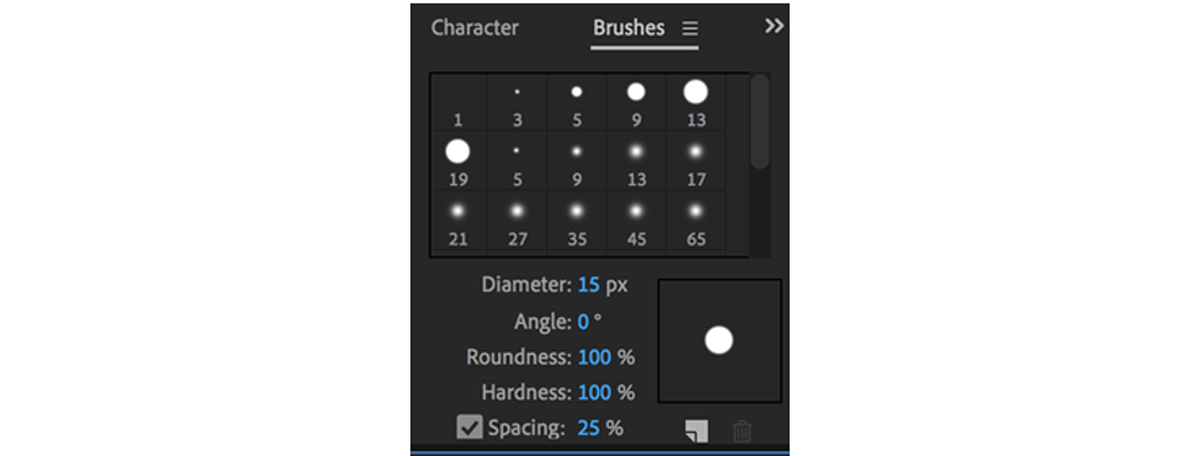
In this example, I created my black outline using a brush with a xv px bore. The color scribbles beneath were roughly twice as thick. Yous can mess effectually with the settings in this menu and use any you would like.
- Set your frame duration in the "paint" panel.
This will signal how many frames of motion your paint strokes volition be on-screen for. The lower the number, the longer it will accept you to breathing—but the more complex the animation will be. For fast-moving motility, you will want to piece of work with unmarried frames. However, slower video footage works fine with a frame duration of two or even iv. It'southward okay to switch the frame duration throughout this project depending on the speed of the video's motion.

In this case, my dancer'due south arms move faster than his legs. For most of the video, I used a frame duration of 1 for the upper body and 2 for the lower body—though I used single frames for faster sections of legwork as well.
One time your paintbrush has a colour, size, and elapsing, you may brainstorm painting over your showtime frame!
- Utilize the command key and arrow keys to advance to the side by side frame.
If you lot have finished your first frame, printing the command and arrow keys at the aforementioned time to skip to the next frame in the reference video. (If you are using a frame duration of 2, yous'll have to press the right arrow key twice, since you're skipping ii frames.)
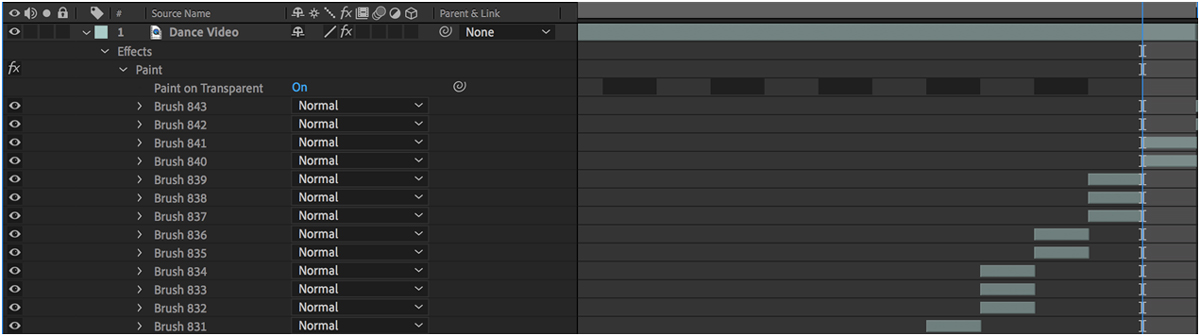
To delete a brushstroke or modify its elapsing, click the downwardly arrow abreast "effects" in your timeline window. Open up the paint layer. You lot should be able to meet all of the brushstrokes you accept created, each spanning the number of frames information technology occupies onscreen. Gyre until you detect the brush you would like to delete or alter. Y'all tin delete a brush using your computer's delete key or modify the length of a brush by dragging the beginning and endpoints back and forth in the timeline.
- Make the video invisible.
For well-nigh rotoscoping projects, you'll want to remove the original video reference and add together a groundwork of your ain. Open up the paint layer, similar we did in the previous footstep, and change "paint on transparent" from off to on.

- Click back into the main composition to view your animation.
Shut the paint layer by going back to your original composition. (The tabs ordinarily appear along the pinnacle of your project window.) Drag the playhead to the starting time and press the spacebar to sentry your animation from offset to end.
DOWNLOAD HERE
How To Draw An Animation By Rotoscoping A Video
Posted by: bassonould.blogspot.com
0 Response to "How To Draw An Animation By Rotoscoping A Video"
Post a Comment